Tuesday, August 31, 2010

Visiting the ceremony venue

After more than a couple phone calls to the Maine Department of Recreation and a written letter of intent to the director of Popham State Park, I am happy to announce that Tom and I have secured the wedding venue location of our dreams, Fort Popham State Historic Site in Phippsburg, Maine. The site is an old civil war era fort that was never used in combat, but is still full of history. The fort is surrounded by ocean on all sides, with a little isthmus of land leading up to it and a parking lot up front. You can see two lighthouses from the fort, as well as lobster boats coming into the nearby marina. Last night was my first opportunity to take Tom there, I am pretty sure that he was thoroughly impressed. My favorite part of the venue is the cost. Nothing! That's right, we have the entire fort reserved for our wedding ceremony, and it did not cost us a dime. It might take a little patience and legwork to get married at a state park, but it is well worth it in the long run.

 Tom and I spent a good couple of hours exploring the fort. I've been a couple times in the past, but this was Tom's first time visiting. I loved the spiral staircases, I kept envisioning a picture of me in my wedding gown with my train going down the spirals. I was caught up in the views, it was a clear day and we could literally see for miles. Tom loved the history aspect and pointed out the cannon tracks and the intricacies of how the fort actually "worked."

After satisfying our inner history geek by thoroughly exploring the fort, we got down to business, well for a few minutes anyway, to discuss wedding logistics. Perhaps the most significant realization that we made was the ease of a rain plan. I know my wedding is over a year away, but I was already starting to stress out about what happened if it rained. Tents can run several hundreds of dollars to rent, and the idea of marrying in the reception hall was less than appealing to me. Fortunately, while exploring the fort, we realized that the inner corridors are more than big enough to set up chairs in. So in the even of rain, we will literally get married IN the fort, now I just need to figure out some sort of quick lighting... candle light perhaps? Regardless, hopefully it won't be raining on our wedding day, in which case, the ceremony will be held in the parade ground of the fort. I like how that sounds so important. Tom and I practiced walking through the gates and down the "aisle" and we determined where we would set up our wedding arch. We also found a more secluded part of the fort where the guys can change after setting up all the chairs for the ceremony.

After exploring the fort and figuring logistics out, we went for a walk on the beach. I attempted to go tide pooling, but the tide did not want to agree with me. I still hopped around on the rocks for a bit. I think my favorite time of day at the beach is early evening, when the sun is low on the horizon. I love the shadows that it makes, and the sky is always full of deep blues and purples. It's so peaceful and calm, I really can't describe it.

Tom and I enjoyed our trip to Fort Popham, and we look forward to our next visit in a week or so for our engagement pictures!

Friday, August 27, 2010

DIY Wedding Sign

This is yet another idea that I got after looking at pictures online. I plan on hanging my sign outside of the fort somewhere so that guests know they have arrived at the right place. The point is that the sign is supposed to look like a random piece of wood that washed up on the beach that I recycled into a wedding sign. I just liked the look and I think it adds the rustic flair that I'm going for.

I didn't have any weathered boards on hand, so I decided to make my own. I find that "aging" wood can be a real stress reliever. I started with a plain board that I found and beat the crap out of it with a rock. I also dropped the board on a cement floor a couple of times, and banged the corners for good measure. Then I painted the whole thing bright purple, it was at this point that my dog walked across the board and left a footprint. It was her little addition to the artwork, unfortunately it didn't show through all the layers of paint. Once the purple was dry, I added a coat of crackle medium. I have found that the thicker the crackle medium, the better the crackles. I wanted my board to look old and neglected, so I just slapped it on and let it dry over night. The next morning, I put on a layer of ivory paint, which subsequently crackled showing some of the purple through. Voila, weathered board, that happens to be in my wedding colors... imagine that. I gave the board a couple hours to dry, and then I varnished the whole thing with a satin brush on varnish. I wanted to put something between the crackle medium and my lettering so that the letters didn't crackle. Finally, with green paint, I painted out my lettering. Again, I let everything dry for a couple hours and added another coat of varnish to seal it off. I hot glued some ribbon on the back to make it a bit easier to hang. Now that my first sign is made, I think I am going to make a couple more to point out parking areas, restrooms, the guestbook table, etc. like I said, "aging" wood is fun. My sister made the suggestion that I use driftwood for the next sign, which would imply a trip to the beach... totally think I can handle that!

Thursday, August 26, 2010

The Search for the Perfect Reception Venue, or, The Dreaded Guest List

Today I visited Kennebec Tavern as a potential reception venue. It's about forty-five minutes from the ceremony venue, which I have already confirmed, and exactly one hour via boat. The attached marina means that Tom and I could make our grand entrance via boat, and we have already talked to a captain that would be more than happy to give us a ride for a more than reasonable price. The menu is just awesome too, and the price is perfect for our budget. Practically everything about the venue is perfect, with one MAJOR catch. The size. The room is small, it's supposedly able to fit 125 people, but when I talked to the events coordinator today, she informed me that if I want dancing I could get 80 people max seated at tables. This caused my first major headache, the guest list. This is the issue, I really don't want to turn people away that want to celebrate our wedding, but at the same time, I need to be able to feed everyone. I've looked at a couple other venues and they are just out of my budget. I know, weddings are expensive, it's the nature of the beast. It doesn't mean that I have to like it.

Tom and I have a shared vision of our wedding reception as being an elegant soiree with foodie-approved food, drinks, music to dance to and just an overall good time.  As of right now, Tom and I are planning to stick with the Kennebec Tavern.  We are starting to finalize our guest list, another major headache, and we have a list of about 70 of our closest friends and family that we are pretty sure will come. I've had to shave off a lot of my extended family from the guest list, so we will see how things work out. I am keeping my eye out for a bigger venue, but at the same time, I kind of like the idea of a small, intimate wedding on the coast of Maine with our closest friends and family. Besides, a smaller number of people means I get to spoil my guests more. Wouldn't it be awesome to have things on the menu like Maine haddock, bacon-wrapped scallops, and other awesomeness from the ocean? 

Tuesday, August 24, 2010

DIY Bridal Jewelry


My mom and I went to a craft store over the weekend. We were roaming through the aisles sort of aimlessly, checking out stuff and getting ideas for future projects. We ended up in the jewelry making aisle. I have long said that I wanted to try making my own jewelry, and a picture on the wall gave me inspiration. I knew I wanted to wear pearls for my wedding jewelry, why not make my own necklace? My mom and I were completely clueless about where to begin, we both agreed that the project was do-able, we just didn't know how. So in true "Jenny and her mom" fashion, we put caution to the wind and went for it. I got two packages of glass pearls, a package of silver glass seed bead, and a string of lavender Austrian crystal. We had an associate help us with what to string the beads on, we originally had a gold wire, but the associate directed us to clear mono-filament string. For clasps, we figured that we both have jewelry kicking around the house that was broken or we didn't wear and we could just take that apart.

Once I got home, I was excited to have a new craft project to work on and immediately got to beading. The mono-filament string was really easy to string the beads on, and I quickly got myself into a pattern, three pearls followed by a crystal, with silver seed beads as spacers. I was really impressed with how elegant the design came out, especially for my first piece of handmade jewelry. Originally, I was only planning on making a necklace, but as it turned out, I had enough beads to make a coordinating bracelet. I still have some beads left over that I am planning on using to make matching earrings, but I need some more supplies to make those. 

For the clasp, my mom brought down a necklace to take apart that she got when she was still married to my dad. It was a simple gold chain with a crystal heart engraved with an "H". I didn't want to throw the charm away, so I added it to my bracelet as a way to commemorate my maiden name. All in all, this was by far the easiest project I have done so far. I attached the clasps by simply tying square knots in the string. Based on my success with this project, I'm pretty sure that I will be making my bridesmaid's jewelry too. 

DIY Aisle Runner

One of the challenges of getting married outside is the need to create a "wedding space" so that the venue looks like a wedding is going to take place there. Tom and I are renting chairs for our guests to sit in, and eventually a wedding arch will be decorated for us to get married under, all that was left was an aisle for me to walk on, or rather, to protect my ivory dress from dragging across the ground. So, an aisle runner was in need. We happen to have an aisle runner kicking around the basement from a previous wedding, and I saw some pictures of hand-painted aisle runners online, so I decided to give it a try. I already had a monogram on my computer that I made for my unity candle, so I blew it up and printed it out. It printed on four pages that I had to tape together. The next step was to place the computer print out under the aisle runner. According to directions I saw online, I was supposed to trace the design out with a pencil, but this turned out to be a bit of a pain, so I went ahead and traced with paint. I used acrylic paint and several different sized brushes. The project is actually quite easier than it looks, it just requires a lot of patience to wait for the paint to dry. Once I finished the lettering, I decided to add a border in order to incorporate both of my wedding colors. Once everything was dry, I took the computer print out from under the aisle runner. It looked pretty good at that point, but I really liked how it looked with the white of the paper showing through under the monogram. So, once the paint was completely dry, I flipped the whole thing over, and painted the back of the monogram with ivory paint. I let this dry over night, and then sprayed the whole thing with spray varnish, to protect the paint from people walking over it. I am really impressed with how my aisle runner came out, when my step-father first saw it,  he thought that I had it professionally printed. I am still contemplating whether or not I want to paint something going down the length of the aisle.

DIY Unity Candle

My first DIY project was a unity candle set. I really like the unity candle ceremony, and I wanted to include it as part of my wedding. I looked around at various stores and online for unity candles, and I couldn't find anything that I liked. I was also rather dismayed at the price, over $30 for a candle? The final blow was when I fell in love with an ivory wedding gown. The majority of commercially made unity candles are white, which would completely clash with my dress. No thank you. I got some inspiration online, and decided to make my own. The first part of the project was actually the hardest, matching colors. It is no easy task to find a pillar candle and tapers in the same color. Most stores that sell pillar candles also sell tapers, but generally the pillar is with the scented candles and the tapers are with the unscented candles. Six stores later, I found my candles at Joanne's, and they were one sale to boot. I also purchased ribbon in my wedding colors. Once I had all my materials, I went to work. 

I wanted my candle to be personalized, so I designed a monogram on my computer. I just used microsoft word, and after tinkering with the size for a bit, printed the design out on vellum. Vellum is a transparent paper that is available at most craft stores, my mom had some kicking around from the scrapbooking drawer. I attached the vellum to the candle with hot glue, which I admit is a bit tricky, my goal was to combination glue/melt the vellum into the wax. I only glued on the back. The next step was to wrap my ribbon around, which I also secured to the back with hot glue. I used two ribbons, a wide purple one and a narrow green one. My mother was kind enough to tie a bow for me. Voila, handmade unity candle. 

I then wrapped my taper candles in ribbon too, so that they would match for the custom look. My mom tied those bows too and I secured everything with hot glue. In place of a unity candle holder (another expense I could do without), I purchased a set of crystal taper holders at the Christmas Tree Shop, which cost me a total of $4. The unity candle itself will be placed on a mirror with a shell garland wrapped around the base. The set will be placed on a small table behind the wedding arch at my ceremony.

I am very happy with how my candles turned out, all in all, once I had all my supplies, it took me about 45 minutes to assemble everything. I am definitely considering this a success and an excellent first DIY project. 


Going Retroactive for a Bit

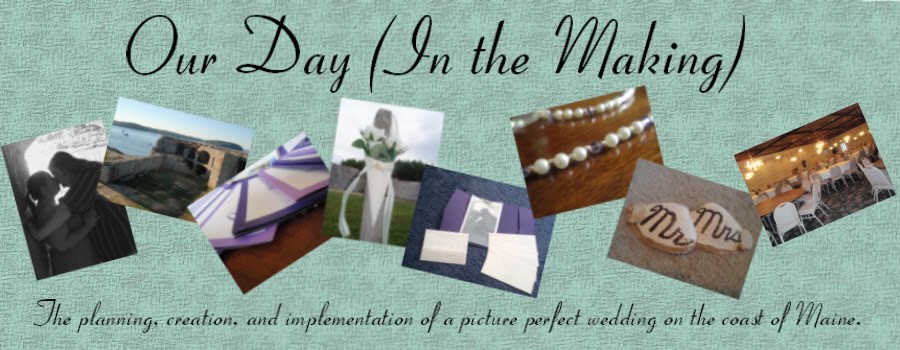
So, I thought about it, and I thought some more, and I decided that the whole point of a blog is to tell someone's story. In the case of this blog, it's the story of a bride that is overly excited about her big day and looking to save a few pennies by making everything myself. Regardless, the only way to properly start a story is from the beginning. So for those of you who are actually reading this, and know me in person, bare with me while I give some background.

Without going into too much detail; Tom and I have been close friends for 11 years. I met him during my senior year of high school. He lived in Missouri, I lived in Maine, so we had a friendship. We talked on the phone pretty much daily through my college years, and at the very least we sent each other e-mails to keep in touch. We never intended to have a relationship, and we actually supported each other through various relationships along the way. Needless to say, a greater power took over, and we fell in love anyway. About ten years later, we decided to finally give a relationship a shot. I was at a point in my life where I really just wanted to start everything over, so I gave it a chance. I visited Missouri, and had a wonderful time. Three months later, I moved from Maine to Kansas City to live with Tom. The following February, he proposed. We set the date for September 10, 2011 knowing that it was going to be a long engagement. We figured that this way people can't accuse us of rushing into things. On a more logistical level, we also figured it would take that long to be able to afford a wedding. We initially started wedding planning in Missouri, we had this beautiful garden picked out to get married in, and the whole wedding was going to have a "Midsummer's Night Dream" theme. Fate stepped in again, and we moved back to Maine during the summer of 2010. Fortunately, I had not yet put any deposits down on the wedding in Kansas City, and we just decided to start over from square one. Being less than on the wealthy side, and wanting to wow my guests with a ceremony venue, since most of the guest list is coming from out of state, many of whom have never seen the ocean, I decided to look into having the ceremony at a state park. After racking my brain about local state parks, I came across the idea of having the wedding at Fort Popham. Imagine the ruins of an old fort, surrounded on three sides by ocean and sand beach. Our ceremony is going to be held in the courtyard of the fort. To my surprise, the venue fee is nothing, and after writing a letter to Maine State Parks and Recreation, it's mine. I confirmed it on Saturday, actually.

The next thing I needed was a reception venue, again, we aren't on the wealthy side. So I hit up google and started looking for options. After coming across some rather ridiculous venues ($1,000,000 in insurance? $8,000 catering minimum? Really?!?) I was fortunate to find the Kennebec Tavern and Marina. As the title implies, it is on the water and has it's own marina. We would have the reception in Sequin Hall, and since there is a restaurant attached that insists on doing its own catering, we would be getting away with about $25/person for the reception. That is more of what I was looking for. The added perk? Since we are getting married on the water, and having the reception on the water, and saved money in the process, we are hiring a boat captain to taken me and Tom on a private cruise up the Kennebec River after our ceremony so that we can arrive at the reception in style.

I guess in terms of wedding inspiration and theme, I guess you can say it created itself. We are having a nautical theme, but not a cheesy whimsical one, instead more of an elegant, historical boat theme. Tom and I are history geeks after all. I'm letting the fort stand for itself in terms of decoration, I really can't compete with the ocean. We are going to have an arch to get married under, an aisle runner to mark the way, and flower cones decorating the aisle. The reception venue is a whole other story. The room is already decorated in a nautical theme, with wooden boats and stuff, I'm just going to go along with it. I'm hoping to get wooden sailboats for centerpieces, along with mason jars filled with sand, seashells, and a candle. Hopefully the wedding arch and flower cones will also be able to make an appearance at the reception. My colors are going to be victorian lilac, celadon, and ivory. In English, that's a silvery lavender, blue-ish light green, and well, ivory. They fit into the antiquated theme quite nicely. I have also met, and chosen my florist, who is going to follow the color scheme with green hydrangeas and lavender roses.

That's my background, in more of a small novel than an outline, but now the stage is set, the story is started, and I can start sharing my projects!

Monday, August 23, 2010

A Little Over a Year to Go

According to various websites and other sources, I'm supposed to be "cherishing my engagement" because it is "such a special time." Truth be told, by the time I walk the aisle, we will have been engaged for approximately 18 months. I've cherished the first six months of my engagement, but, quite frankly, the next year can hurry itself up. I'm ready to be a newlywed, you could even say I'm chomping at the bit. With a little over a year to go, I have found, and confirmed, my ceremony location. I have also found a tentative reception venue, florist, DJ, and photographer. The word tentative is applied because I have yet to pay my deposit. I have also picked out THE dress, it's just a matter of putting 50% down to have it ordered, which I have plenty of time to do. I didn't expect to completely fall in love with the second dress I tried on. Since time is definitely on my side in terms of planning, and the calendar doesn't seem to want to pass by any faster, I've taken on the task if "DIY-ing" pretty much everything that I can. As of now, I have hand-painted our monogram on my aisle runner, created a unity candle set, wove a flower girl basket, hand-painted a sign for the wedding, and beaded my wedding jewelry. With that under my belt, I still have a ring bearer's pillow to sew, bridesmaid's jewelry to make, favors and centerpieces to put together, and the daunting task of wedding stationary... invitations, programs, etc. I'm hoping to use this blog as a place to post about my projects, as well as an opportunity to express my excitement and vent my frustrations about wedding planning. Hopefully, someone will find my words useful, and if not, I guess I'll have a nice keepsake for when everything is done.

~Jenny